
Introduction to Spinach Stuffed Pie
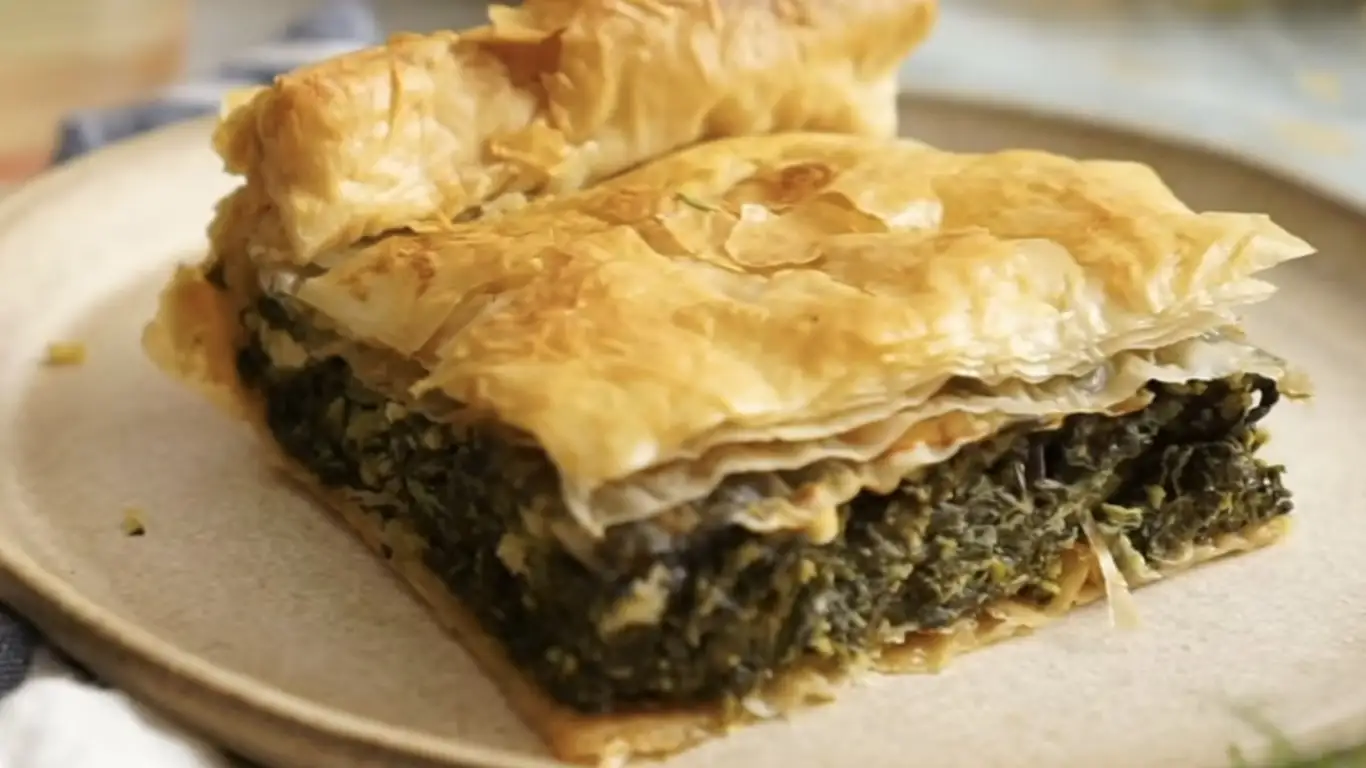
Spinach-stuffed pie represents the perfect marriage of nutrition and comfort food, combining leafy greens with savoury pastry in a dish that has stood the test of time across multiple cultures. Whether you’re familiar with Greek spanakopita, Middle Eastern fatayer, or Italian torta pascualina, the fundamental appeal remains the same: tender spinach, tangy cheese, and crispy pastry create an irresistible combination.
What Makes a Perfect Spinach Pie
The secret to an exceptional spinach-stuffed pie lies in balancing moisture and texture. The filling must be rich and flavorful without becoming watery, while the pastry should remain crisp and flaky throughout. A perfect spinach pie offers distinct layers of flavour – the earthy depth of spinach, the salty tang of cheese, the subtle warmth of aromatics like nutmeg and garlic, all contained within a buttery, crisp exterior. Unlike store-bought versions that often compromise on quality ingredients, homemade spinach pie allows you to control every element for superior flavour and texture.
Cultural Variations: From Greek Spanakopita to Italian Torta Pascualina
Spinach pies appear in Mediterranean and Middle Eastern cuisines with fascinating regional differences. Greek spanakopita features tissue-thin phyllo layers creating an exceptionally crispy exterior, while the filling combines spinach with feta, eggs, and herbs like dill. Italian torta pascualina includes hard-boiled eggs nestled within the spinach filling, traditionally served during Easter celebrations. Middle Eastern fatayer takes a different approach with individual hand-shaped pastries filled with spinach, pine nuts, and sumac for a lemony tang. Each tradition offers unique insights into working with spinach in pastry form, and this recipe draws inspiration from these time-tested techniques while remaining accessible for home cooks.
Health Benefits of Spinach in Your Diet
Beyond its delicious flavour, spinach delivers impressive nutritional benefits that elevate this dish beyond mere comfort food. Rich in iron, calcium, and vitamins K, A, and C, spinach supports bone health, immune function, and energy levels. The dark leafy green contains powerful antioxidants like lutein that protect eye health and reduce inflammation. When combined with calcium-rich cheeses in this pie, the nutritional profile becomes even more impressive. This spinach-stuffed pie allows you to enjoy these health benefits in a form that appeals to even reluctant vegetable eaters.
Why This Recipe Works Every Time
This particular spinach pie recipe has been refined through countless testing sessions to address common pitfalls. The method of properly draining spinach eliminates excess moisture that would otherwise create a soggy crust. The careful balance of cheeses provides rich flavour without overwhelming the spinach. Most importantly, the step-by-step technique creates consistent results even for first-time bakers. Whether serving this as a vegetarian main course, an elegant appetiser, or a portable lunch option, this recipe delivers professional results with home kitchen convenience.
Essential Ingredients for Spinach Stuffed Pie
The magic of a truly exceptional spinach stuffed pie lies in starting with the right ingredients. While this recipe remains forgiving and adaptable to what you have on hand, understanding each component’s role helps you make informed substitutions without compromising the end result. Here’s your comprehensive guide to gathering everything needed for spinach pie success.
Choosing Between Fresh and Frozen Spinach
The spinach debate often divides home cooks, but both fresh and frozen options have their place in this recipe. Fresh spinach offers a vibrant color and slightly sweeter flavor, but requires significant volume (about 2 pounds) as it wilts down dramatically during cooking. The extra step of blanching and thoroughly squeezing out moisture adds time but rewards you with superior texture.
Frozen spinach provides convenience and consistency year-round. The pre-blanched, chopped nature saves considerable prep time, making it perfect for weeknight cooking. The key to success with frozen spinach lies in thawing it completely and extracting every bit of excess moisture place it in a clean kitchen towel and wring until no more liquid emerges. This prevents the dreaded soggy bottom that ruins otherwise perfect pies.
Whichever option you choose, aim for about 20 ounces of spinach after cooking and draining to maintain the proper filling consistency. The spinach forms the foundation of your pie, so don’t skimp on proper preparation.
Selecting the Right Cheese Combination (Feta, Ricotta, Parmesan)
The cheese mixture provides both structure and flavor to your spinach pie, with each variety contributing unique qualities. Traditional recipes typically include:
Feta cheese (8 ounces) delivers the characteristic tangy saltiness that cuts through the earthiness of spinach. Authentic Greek feta made from sheep’s milk offers the most complex flavor, but any good-quality feta works beautifully. Crumble it finely rather than process it to maintain some texture in each bite.
Ricotta cheese (1 cup) creates the creamy base that binds everything together. Fresh ricotta provides superior results compared to mass-produced versions, with a delicate milky flavor and lighter texture. For best results, drain excess liquid from your ricotta by placing it in a fine-mesh sieve for 30 minutes before mixing.
Parmesan cheese (1/4 cup, freshly grated) adds umami depth and savory notes that round out the filling. Skip the pre-grated stuff in favor of freshly grating from a block of aged Parmigiano-Reggiano or Grana Padano for maximum flavor impact.
Some regional variations incorporate cottage cheese, goat cheese, or even halloumi for different flavor profiles. Feel free to experiment with these alternatives while maintaining the same overall cheese-to-spinach ratio.
Phyllo Dough vs. Traditional Pie Crust Options
Your choice of pastry dramatically affects both the final presentation and flavor profile of your spinach pie:
Phyllo dough creates the classic paper-thin, shatteringly crisp exterior associated with Greek spanakopita. Working with these delicate sheets requires gentle handling and brushing each layer with melted butter or olive oil. Store-bought phyllo works perfectly fine just thaw it properly overnight in the refrigerator and keep sheets covered with a damp towel while assembling to prevent drying out. You’ll need approximately 20 sheets for a standard 9×13 inch baking dish.
Traditional pie crust offers a more substantial, buttery foundation that stands up well to the filling. For a homemade version, a simple ratio of 2½ cups flour, 1 cup cold butter, 1 teaspoon salt, and 4-6 tablespoons ice water creates perfect results. The key lies in handling the dough minimally and keeping everything cold to maintain flakiness.
Puff pastry provides a convenient middle ground—thicker than phyllo but still creating impressive layers. One pound of all-butter puff pastry (thawed according to package directions) covers a standard pie dish beautifully.
Flavor Enhancers: Herbs, Garlic, and Seasonings
The supporting cast of aromatics and seasonings transforms basic ingredients into a memorable flavor experience:
Fresh herbs bring brightness to the rich filling. Dill (2 tablespoons) offers traditional Greek flavor, while flat-leaf parsley (1/4 cup) adds freshness without overpowering. Fresh mint (1 tablespoon, finely chopped) provides an authentic touch that elevates the entire dish. Dried herbs work in a pinch, but reduce quantities by half.
Alliums provide essential depth. Sauté one medium onion (finely diced) and 3-4 garlic cloves (minced) until softened and fragrant before adding to your filling mixture. Some traditional recipes include sliced green onions (about 4) for their milder flavor and subtle color contrast.
Spices should complement rather than dominate. A gentle grating of nutmeg (about 1/4 teaspoon) enhances the greens without announcing itself, while a pinch of white pepper adds warmth without visible specks. Always season with salt carefully, accounting for the saltiness already present in your cheese selection.
Lemon zest (from one lemon) brightens all the flavors with citrus notes that cut through the richness. This often-overlooked ingredient makes a remarkable difference in the final taste profile.
Eggs (typically 2-3) serve both as binding agents and richness enhancers. They help the filling set into sliceable portions while adding a custardy quality that bridges the gap between cheese and vegetables.
Kitchen Tools and Preparation Steps
Creating the perfect spinach stuffed pie doesn’t require professional equipment, but having the right tools makes the process smoother and more enjoyable. This section breaks down everything you need to prepare before diving into assembly, ensuring your spinach pie journey remains stress-free from start to finish.
Must-Have Equipment for Perfect Results
The beauty of spinach pie lies in its rustic simplicity, requiring only basic kitchen equipment that most home cooks already own:
Baking dish options: A 9×13-inch rectangular dish creates the traditional spanakopita shape with maximum crispy edge portions. Alternatively, a 9-inch round pie plate works beautifully for a more classic presentation. For best results, choose a dish with some depth (at least 2 inches) to accommodate the filling without overflow. Glass or ceramic dishes distribute heat more evenly than metal, creating that perfect golden crust without burning.
Mixing bowls: You’ll need at least two one large bowl (at least 4-quart capacity) for combining the filling ingredients, and a medium bowl for whisking eggs and smaller components. Having an extra bowl dedicated to draining spinach saves you from washing and reusing mid-recipe.
Cutting board and sharp knife: Choose a stable surface for chopping herbs, garlic, and onions. A chef’s knife makes quick work of these tasks, though any sharp knife will suffice.
Cheese tools: A box grater handles the Parmesan, while a fork works perfectly for crumbling feta. No need for specialty equipment here.
Pastry brush: This humble tool proves essential when working with phyllo dough, allowing you to apply melted butter or olive oil in thin, even layers without tearing the delicate sheets. A silicone brush cleans more easily, but a traditional brush offers better control.
Kitchen towels: Clean cotton towels serve multiple purposes—covering phyllo dough to prevent drying, squeezing moisture from spinach, and providing quick hand-drying during preparation.
Measuring cups and spoons: Precision matters, particularly when balancing the cheese-to-spinach ratio. Having both dry and liquid measures ensures accuracy throughout the recipe.
Sauté pan: Choose a 10-12 inch skillet with some depth for wilting fresh spinach or sautéing onions and garlic. Non-stick makes cleanup easier but isn’t essential.
Optional but helpful: A pastry cutter creates clean edges when trimming phyllo, while a pizza wheel makes quick work of scoring the top layer before baking.
Preparing Your Spinach Filling (Preventing Sogginess)
The critical step that separates exceptional spinach pie from mediocre attempts lies in properly preparing the spinach to eliminate excess moisture:
For fresh spinach (approximately 2 pounds), begin by removing any tough stems and roughly chopping the leaves. Wash thoroughly in cold water, then choose one of two methods: blanching or sautéing.
Blanching method: Drop spinach into boiling water for just 30 seconds, then immediately transfer to an ice bath to halt cooking. This preserves the bright green color while softening the leaves. Drain completely in a colander.
Sauté method: Work in batches, adding handfuls of fresh spinach to a hot skillet with a tablespoon of olive oil. Cook just until wilted, about 1-2 minutes per batch. Transfer to a colander as you continue with remaining spinach.
For frozen spinach (two 10-ounce packages), thaw completely—either overnight in the refrigerator or using the defrost function on your microwave. Do not cook further.
The crucial moisture removal step: Regardless of which spinach you’ve chosen, place the cooked or thawed spinach in the center of a clean kitchen towel. Gather the corners and twist firmly over a sink or bowl, wringing out every possible drop of liquid. You’ll be surprised by how much emerges! Continue until no more liquid can be extracted. This step cannot be rushed or skipped—it’s the difference between crispy, flaky pie and a soggy disappointment.
Transfer the dried spinach to a cutting board and chop finely before adding to your mixing bowl. Breaking down the spinach now ensures easier incorporation with other ingredients and a more uniform texture in the final pie.
Working with Phyllo Dough: Tips for Beginners
Phyllo’s paper-thin nature intimidates many home cooks, but these simple techniques make it surprisingly manageable:
Proper thawing: Move frozen phyllo from freezer to refrigerator 24 hours before you plan to cook. Attempting to rush this process results in tearing or sticking sheets. Remove from refrigerator 1 hour before use to reach room temperature.
Workspace preparation: Before opening the phyllo package, organize your workstation completely. Have your baking dish ready, butter melted (about 3/4 cup), pastry brush at hand, and a clean, slightly damp kitchen towel nearby. Work on a clean, dry counter with enough space to fully unfold the sheets.
Handling technique: Open the package and unroll the phyllo sheets carefully. Immediately cover with the damp towel to prevent drying. When ready to work, remove one sheet at a time, keeping the rest covered. Hold sheets by the corners rather than the middle to prevent tearing.
Layering method: Work quickly but gently. Lay a single sheet in your baking dish, allowing excess to hang over the edges. Brush lightly with melted butter or olive oil a thin layer works better than soaking. Add another sheet, brushing again. For traditional spanakopita, aim for 8-10 sheets on the bottom, 8-10 on top.
Dealing with tears: Don’t panic when sheets tear they’re almost inevitable! Simply piece them together and continue brushing with butter. These small imperfections disappear during baking as layers fuse together.
Edge treatment: After placing your filling, fold overhanging phyllo back over the top, brushing between layers. This creates a neat edge while adding extra crispness to the perimeter.
Make-Ahead Preparation Options
Spinach pie becomes weeknight-friendly with these time-saving preparation strategies:
Component prep: Several elements can be prepared up to three days ahead and refrigerated separately: chopped and drained spinach, sautéed onion and garlic mixture, and herb-cheese mixture (minus the eggs). Store each in airtight container. Wait to add eggs until the day of baking.
Full assembly, delayed baking: Assemble the entire pie up to 24 hours before baking, cover tightly with plastic wrap, and refrigerate. Allow an extra 10-15 minutes of baking time when starting from cold. This method works beautifully for dinner parties or holiday gatherings.
Bake now, reheat later: Fully bake the pie, cool completely, then refrigerate for up to 3 days. Reheat in a 300°F oven for 15-20 minutes until warmed through. The texture remains surprisingly crisp.
Freezing options: For longer storage, freeze unbaked assembled pie for up to 3 months. Wrap tightly in plastic wrap, then aluminium foil, labelling with date and baking instructions. Bake directly from frozen, adding approximately 20 minutes to baking time.
Individual portions: For grab-and-go convenience, prepare filling and cut phyllo sheets into 5-inch squares. Create triangular packets, brush with butter, and freeze solid on baking sheets before transferring to freezer bags. Bake individual portions straight from frozen until golden brown.
Step-by-Step Spinach Pie Assembly
Now that you’ve prepared all your components, it’s time for the most satisfying part of the process—assembling your spinach stuffed pie. This section breaks down the assembly into manageable steps, ensuring even novice bakers achieve professional-looking results. Follow these techniques carefully for a pie that’s as beautiful as it is delicious.
Creating the Perfect Flaky Base Layer
The foundation of your spinach pie determines both its structural integrity and textural contrast. Building a proper base requires attention to detail:
Prepare your baking dish: Start with a light coating of butter or olive oil across the bottom and sides of your dish. This prevents sticking while adding flavor to the outer crust. For rectangular dishes, a light spray of cooking oil works well in hard-to-reach corners.
The critical first sheet: Place your first phyllo sheet carefully, centering it over the dish. This initial layer sets the pattern for all that follow. Allow excess phyllo to hang over the edges evenly on all sides—this overhang will form part of your top crust later. Brush this sheet generously with melted butter, reaching all the way to the corners and edges where flakiness matters most.
Building thickness gradually: Add subsequent sheets one by one, rotating the orientation slightly with each addition. This crisscross pattern creates structural strength while ensuring even coverage. For sheets 2 through 8, brush each with butter before adding the next. Work confidently but gently—speed matters when working with phyllo to prevent drying.
Creating corner strength: Pay special attention to the corners, which tend to become too thick or too thin. For rectangular dishes, fold excess corner material into triangular reinforcements. For round dishes, pleat the excess gently to distribute it evenly around the circumference.
The butter balance: Apply enough butter between layers to create distinct separation during baking, but avoid soaking the sheets. A light, even coating works better than pooling butter in certain areas. If your butter resolidifies during the process, warm it gently rather than applying it cold.
Alternative crust options: If using traditional pie crust instead of phyllo, roll your dough approximately 1/8-inch thick and 2 inches larger than your dish on all sides. Transfer by loosely rolling around your rolling pin, then unrolling over the dish. Press gently into corners without stretching, then trim overhang to 1 inch all around. Refrigerate for 15 minutes before adding filling to prevent shrinkage.
Mixing the Creamy Spinach Filling
Properly combining your ingredients ensures consistent flavor and texture throughout every bite:
Final spinach preparation: Before incorporating into your cheese mixture, give the spinach a final squeeze to remove any last drops of moisture that may have surfaced. Chop it finely on a cutting board, breaking up any remaining clumps or stringy pieces.
The ideal mixing order: Begin by combining all cheeses in your large mixing bowl—the crumbled feta, drained ricotta, and freshly grated Parmesan. Mix with a wooden spoon until roughly combined but still textured. Add your sautéed onion and garlic mixture, stirring gently to distribute.
Incorporating herbs and seasonings: Sprinkle your chopped fresh herbs (dill, parsley, mint) over the cheese mixture along with lemon zest, nutmeg, salt, and pepper. Mix thoroughly but gently to distribute the flavors evenly without compacting the mixture.
The spinach integration: Add your prepared spinach to the bowl in three batches rather than all at once. This prevents clumping and ensures even distribution. Use a gentle folding motion instead of vigorous stirring to preserve the texture.
The binding eggs: In a separate small bowl, lightly beat your eggs with a fork just until combined. Create a well in the center of your spinach-cheese mixture and pour in the beaten eggs. Fold everything together using a rubber spatula, working from the bottom up to incorporate all ingredients without overmixing.
Final texture assessment: The perfect filling should be moist but not wet, holding together when scooped but not dry or crumbly. It should drop heavily from a spoon rather than run off in a liquid state. If it seems too wet, add 1-2 tablespoons of breadcrumbs. If too dry, add an additional beaten egg.
Layering Techniques for Even Cooking
Proper distribution of filling ensures each slice contains the perfect balance of ingredients:
The dollop method: Rather than pouring your entire filling at once, use a large spoon to place dollops across the base crust. Start in the corners and work toward the center, spacing them evenly. This prevents having to spread a heavy mass of filling, which could tear the delicate phyllo base.
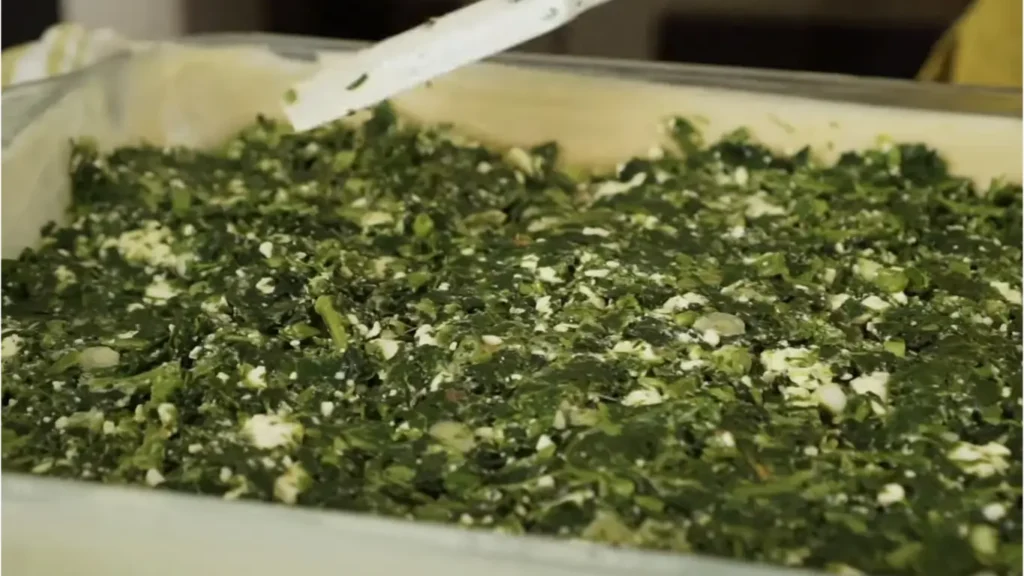
Gentle spreading: Using the back of a large spoon or an offset spatula, carefully connect the dollops, spreading the filling into an even layer. Work from the center outward, maintaining a consistent thickness throughout. Leave a half-inch border around the edges unfilled to allow for proper sealing.
Creating a level surface: Smooth the top of your filling completely, eliminating any peaks or valleys that could cause uneven cooking. Press gently to remove any large air pockets without compacting the filling excessively.
Edge reinforcement: For extra stability, brush the exposed phyllo border with additional butter before continuing with the top crust. This creates a strong seal around the perimeter where leaks most commonly occur.
Traditional variations: Some regional recipes incorporate distinct layers within the filling—perhaps a central layer of sliced hard-boiled eggs in the style of torta pascualina, or a separate layer of milder cheese beneath the spinach mixture. If incorporating these elements, place them carefully after spreading half the spinach mixture, then cover with the remaining filling.
Achieving That Golden, Crispy Top
The final layer creates the dramatic presentation and satisfying crunch that defines a great spinach pie:
Creating the top crust: Just as with the base, place phyllo sheets one at a time across the filling, brushing each with butter before adding the next. For the most attractive finish, fold any overhanging phyllo from the bottom layer up and over the filling first, then add new full sheets on top.
Sealing the edges: Tuck the edges of each top sheet down between the filling and the side of the baking dish. This forms a seal that keeps the filling from bubbling out while baking. For extra security, pinch and roll the edges to create a decorative crimped border.
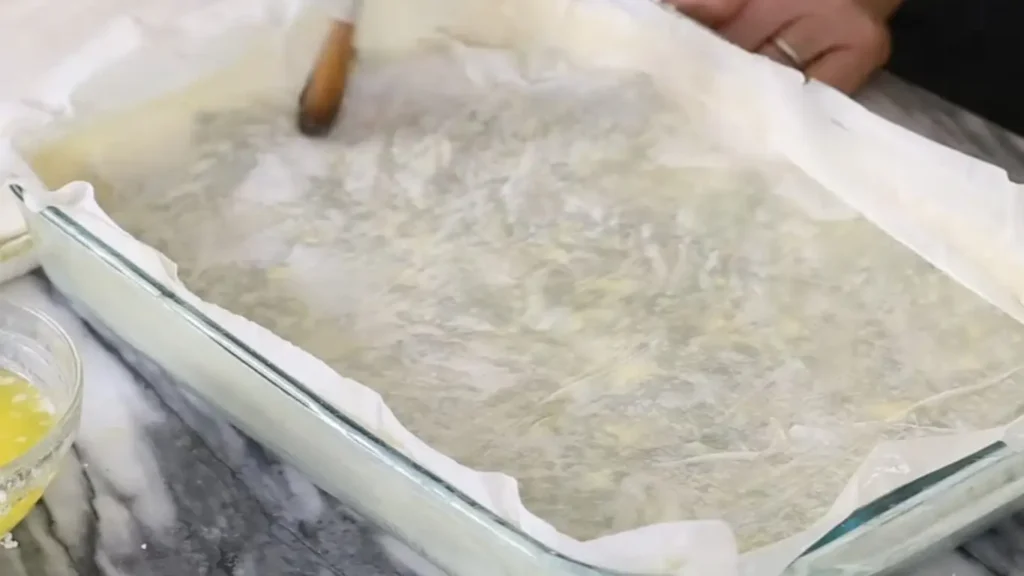
The final butter brush: After placing your last phyllo sheet, brush the entire surface generously with butter, ensuring no dry spots remain. This final coating creates that irresistible golden color and crispy texture.
Creating steam vents: Before baking, use a sharp knife to cut 4-6 small slits through the top crust only. These vents allow steam to escape during baking, preventing the top from ballooning and separating from the filling. For decorative effect, arrange these cuts in a pattern—perhaps a star or crosshatch design.
Optional toppings: For additional flavor and visual appeal, consider sprinkling the top with sesame seeds, nigella seeds, or a light dusting of extra Parmesan before baking. Some bakers brush the top with a mixture of egg yolk and water for extra shine and deeper color.
Pre-scoring for serving: For the cleanest slices later, lightly score the top crust into your desired portion sizes before baking. Cut through the top few layers of phyllo only, not into the filling. These guidelines will make serving neater while allowing steam to escape during baking.
Baking Your Spinach Stuffed Pie to Perfection
The baking process transforms your carefully assembled components into a cohesive masterpiece with contrasting textures and flavors. Following these precise techniques ensures consistent results every time you make this Mediterranean classic.
Optimal Temperature and Timing Guidelines
Successful spinach pie baking requires proper heat management from start to finish:
Preheating is non-negotiable: Allow your oven to fully preheat to 375°F (190°C) before inserting your pie. An oven thermometer confirms your actual temperature, as many home ovens run hot or cold by 25 degrees or more.
Initial high-heat period: For the first 15 minutes of baking, the high temperature creates steam that lifts and separates the phyllo layers. This critical phase establishes the foundation for flakiness rather than sogginess.
Main baking phase: After the initial period, maintain temperature at 375°F for approximately 35-40 minutes. This moderate heat cooks the filling thoroughly without burning the delicate phyllo top.
Baking position matters: Place your pie in the middle rack of your oven, where heat circulates most evenly. Avoid the temptation to bake multiple dishes simultaneously, as this can create steam and affect browning.
Adjusting for different crusts: Traditional pie crusts require slightly different treatment—blind bake for 10 minutes before adding filling, then reduce temperature to 350°F for the remaining baking time to prevent over-browning.
Visual Cues for Doneness
Rather than relying solely on timing, use these visual indicators to determine when your pie has reached perfection:
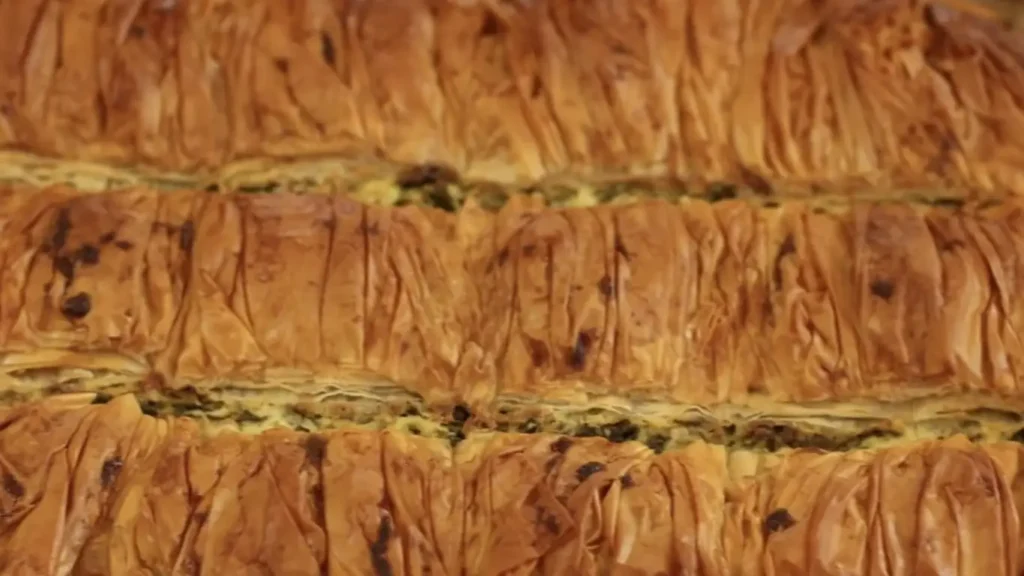
Color development: The top should reach a deep golden brown, not just pale yellow. Areas of darker caramelization along edges add flavor complexity but shouldn’t dominate.
Filling stability: When gently shaking the dish, the filling should appear set with minimal jiggling in the center. Any slight movement should be uniform rather than liquid-like.
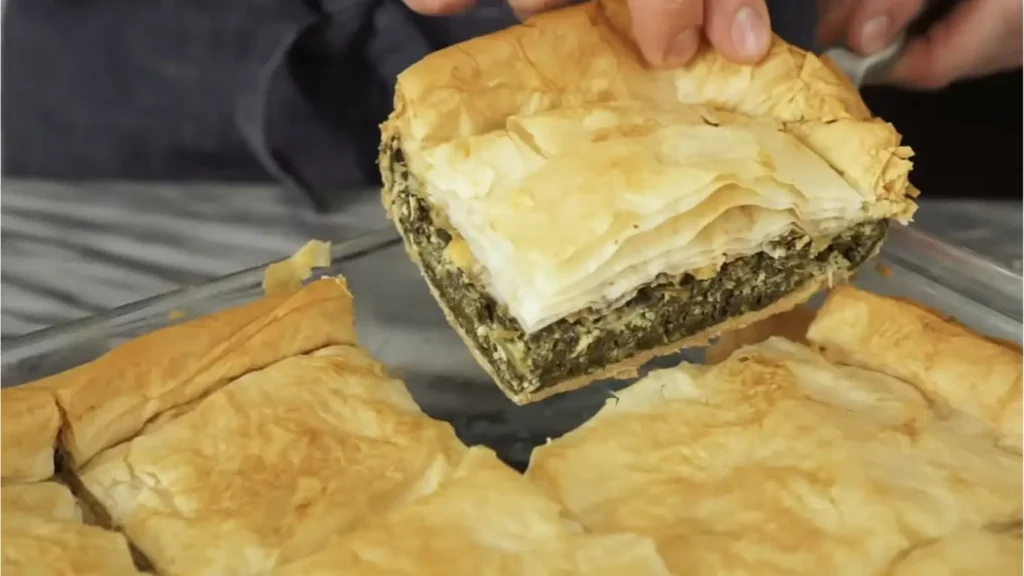
Edge separation: A properly baked pie often pulls slightly away from the edges of the baking dish as the filling sets and contracts. This natural shrinkage indicates thorough cooking.
Aroma signals: The pie releases a distinctly nutty, buttery fragrance when fully baked. This olfactory cue often precedes visual ones and signals approaching doneness.
Preventing Common Issues (Soggy Bottom, Burnt Edges)
Troubleshoot typical challenges with these preemptive techniques:
Soggy bottom prevention: Place your baking dish on a preheated baking sheet to intensify bottom heat. This simple trick ensures crispy lower layers even in glass baking dishes.
Edge protection: If edges brown too quickly while the center remains pale, create a foil shield by gently laying a piece of aluminum foil over just the perimeter during the final 15 minutes of baking.
Dealing with undercooked filling: Insert a knife into the center—it should emerge warm to the touch. If filling seems undercooked while the top has browned properly, cover the entire dish with foil and continue baking at reduced temperature (325°F) until filling sets.
Avoiding phyllo sogginess: Never cover hot spinach pie immediately after baking, as trapped steam reabsorbs into the crust. Allow 5-10 minutes of uncovered cooling before any covering.
Cooling Process for Best Texture
The final stage often gets overlooked but significantly impacts your end result:
Immediate resting period: Allow the pie to rest uncovered for 15-20 minutes after removing from the oven. This critical time allows internal steam to dissipate while the filling firms up for cleaner slicing.
Cooling rack transition: After the initial rest, carefully transfer the entire baking dish to a wire cooling rack. This prevents condensation underneath that could compromise your bottom crust.
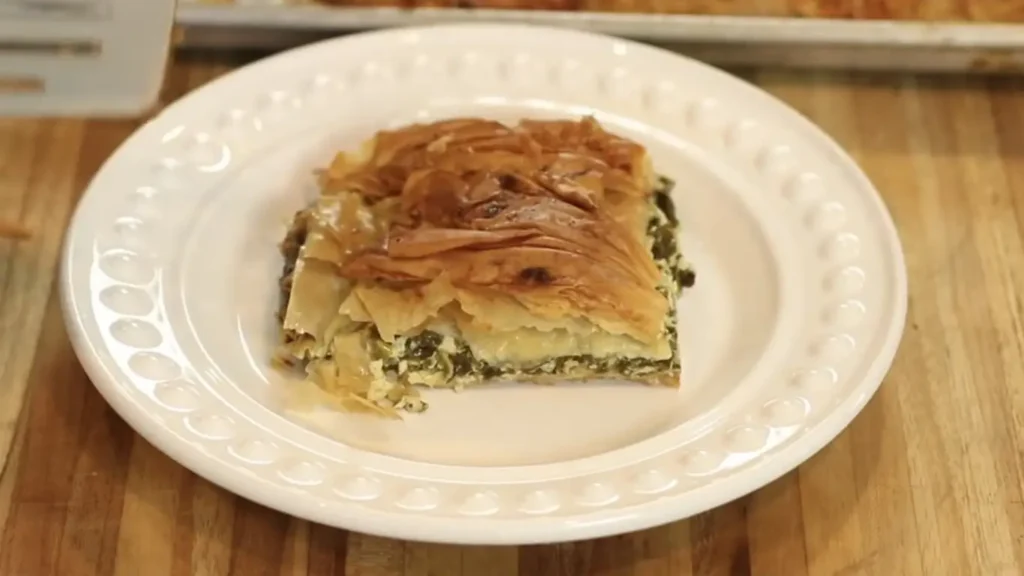
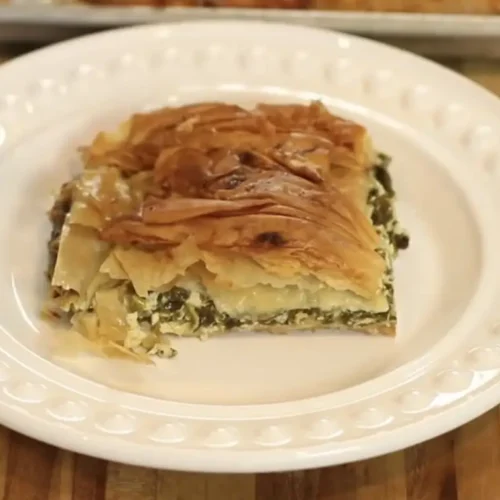
Ideal serving temperature: While some prefer spinach pie piping hot, flavors actually intensify at slightly cooled temperatures. Room temperature or just slightly warm offers the perfect balance of texture and taste.
Reheating considerations: If serving later, cool completely before covering to maintain crispness. Reheat uncovered in a 300°F oven for 15-20 minutes rather than using a microwave, which would soften the crust.
Serving and Storing Your Homemade Spinach Pie
The final steps of presenting and preserving your spinach stuffed pie deserve the same attention to detail as the preparation. With proper serving techniques and storage methods, you’ll maximize both enjoyment and longevity of this Mediterranean classic.
Perfect Pairings and Side Dish Suggestions
Enhance your spinach pie experience with thoughtfully selected accompaniments:
Fresh accompaniments: A simple Greek salad with ripe tomatoes, cucumber, kalamata olives, and red onion provides refreshing contrast to the rich pie. The acidic components cut through the richness while complementing the Mediterranean flavor profile.
Yogurt-based sauces: Traditional tzatziki offers cooling cucumber and garlic notes that balance the savory pie. For variation, try labneh drizzled with olive oil and za’atar, or plain Greek yogurt mixed with fresh herbs.
Soup pairings: For cooler months, serve smaller portions alongside tomato soup or lemon-chicken orzo soup. The brightness of these broths counterbalances the density of the pie perfectly.
Wine selections: The tangy feta and earthy spinach pair beautifully with crisp white wines like Assyrtiko or Sauvignon Blanc. For red wine lovers, light-bodied options like Pinot Noir complement without overwhelming.
Refrigeration and Reheating Methods
Proper handling ensures your spinach pie maintains its texture and flavor for days:
Initial cooling: Allow the pie to cool completely before refrigerating—about two hours at room temperature. Rushing this step traps steam and creates condensation that softens the crust.
Refrigeration technique: For whole pies, cover loosely with parchment paper first, then aluminum foil. This double-layer approach prevents moisture from collecting on the top crust while protecting from refrigerator odors.
Portioning strategy: Consider cutting into individual portions before refrigerating for easier reheating later. Space slices slightly apart on a parchment-lined baking sheet and refrigerate uncovered for 30 minutes before transferring to containers.
Optimal reheating: Restore crispness by reheating in a 325°F oven for 15-20 minutes until warmed through. Avoid microwaving, which creates unappetizing soggy spots and uneven heating.
Freezing Instructions for Future Enjoyment
Extend your enjoyment with these freezer-friendly approaches:
Pre-baked freezing: Fully bake your pie, cool completely, then portion into serving sizes. Wrap individual pieces tightly in plastic wrap followed by foil, then freeze for up to three months.
Unbaked freezing: Assemble the entire pie through the final brushing with butter, but don’t bake. Cover tightly with plastic wrap and foil, label with date, and freeze for up to two months. Bake directly from frozen at 375°F, adding 15-20 minutes to normal baking time.
Thawing recommendations: For best texture when freezing pre-baked portions, thaw overnight in refrigerator before reheating. This gradual temperature change prevents sogginess from condensation.
Avoiding freezer burn: Use a vacuum sealer if available, or press all air out of wrapping. Double-wrapping provides additional protection against freezer odors and dehydration.
Transforming Leftovers into New Meals
Reimagine remaining spinach pie with these creative approaches:
Breakfast transformation: Top a slice with a poached egg and hollandaise for an elegant breakfast. The runny yolk creates a luxurious sauce that reinvigorates day-old pie.
Lunchbox solution: Cold spinach pie travels remarkably well in lunch containers. Pair with cherry tomatoes and olives for a complete Mediterranean-inspired meal that doesn’t require reheating.
Appetizer conversion: Cut refrigerated leftovers into bite-sized pieces and rewarm briefly in the oven. Serve with toothpicks and a yogurt dipping sauce for instant party fare.
Soup enhancement: Cube leftover pie into 1-inch pieces and add to vegetable broth during the last few minutes of cooking. The pie adds body and flavor to the simplest soups while finding new purpose.
Perfect Homemade Spinach Stuffed Pie
Ingredients
- 2 pounds fresh spinach (or 20 ounces frozen spinach, thawed and drained)
- 8 ounces feta cheese, crumbled
- 1 cup ricotta cheese, drained
- ¼ cup freshly grated Parmesan cheese
- 1 medium onion, finely diced
- 3-4 cloves garlic, minced
- 2 tablespoons fresh dill, chopped
- ¼ cup fresh parsley, chopped
- 1 tablespoon fresh mint, finely chopped (optional)
- 2-3 large eggs, lightly beaten
- Zest of one lemon
- ¼ teaspoon freshly grated nutmeg
- Salt and white pepper to taste
- 1 package (1 pound) phyllo dough, thawed
- ¼ cup butter, melted (or olive oil)
Instructions
- Preheat oven to 375°F (190°C). Lightly oil a 9×13-inch rectangular baking dish or a 9-inch round pie plate.
- If using fresh spinach, remove any tough stems and roughly chop. Blanch in boiling water for 30 seconds, then transfer to an ice bath. If using frozen spinach, thaw completely.
- Place spinach in a clean kitchen towel and wring out all excess moisture. Chop finely and set aside.
- Heat 2 tablespoons olive oil in a skillet over medium heat. Sauté onion until translucent, about 5 minutes. Add garlic and cook for 30 seconds more. Allow to cool.
- In a large bowl, combine feta, ricotta, and Parmesan cheeses. Add the spinach, onion-garlic mixture, dill, parsley, mint, lemon zest, nutmeg, salt, and pepper. Mix well.
- Create a well in the center and add the beaten eggs. Fold everything together until fully incorporated. Set aside.
- Unroll phyllo dough and cover with a damp kitchen towel to prevent drying. Work with one sheet at a time, keeping the rest covered.
- Place one phyllo sheet in the prepared baking dish, allowing edges to hang over. Brush lightly with melted butter. Repeat with 8-10 sheets, brushing each with butter.
- Spread the spinach filling evenly over the phyllo base.
- Fold any overhanging phyllo edges over the filling. Top with 8-10 more phyllo sheets, brushing each with butter.
- Tuck edges down sides of dish and brush the top generously with butter.
- Score the top crust into serving portions with a sharp knife, cutting through just the top few layers.
- Bake for 45-50 minutes, or until the top is golden brown and the filling is set.
- Remove from oven and let rest for 15-20 minutes before serving.
- Cut along pre-scored lines and serve warm or at room temperature.
Notes
- Ensure all excess moisture is removed from the spinach to prevent a soggy crust.
- Store leftover pie in the refrigerator for up to 3 days. Reheat in a 300°F oven for 15 minutes to restore crispness.
- Freeze unbaked or baked pie for up to 3 months. If freezing unbaked, bake directly from frozen, adding 15-20 minutes to the baking time.
- Serve with a side of Greek salad or tzatziki sauce for a complete meal.
Conclusion: Mastering the Art of Spinach Stuffed Pie
Creating the perfect spinach stuffed pie represents a beautiful balance of technique and heart. This Mediterranean classic has endured for generations because it transforms simple ingredients into something truly magnificent—crisp layers of pastry surrounding a savory filling where spinach shines as the star rather than an afterthought.
The journey from raw ingredients to golden-brown perfection teaches valuable cooking principles that extend far beyond this single recipe. You’ve learned to control moisture (the enemy of crispness), build flavor through thoughtful combinations, work confidently with delicate ingredients, and trust visual cues over rigid timing. These skills transfer to countless other dishes in your culinary repertoire.
Don’t worry if your first try doesn’t turn out perfectly. Each spinach pie you make builds comfort and confidence with the process. The beauty of this dish lies partly in its forgiving nature—even imperfect versions taste delicious, and small adjustments with each iteration bring you closer to your ideal version.
Consider this recipe a framework rather than an absolute rule. As you become more comfortable with the basics, experiment with regional variations or personal touches—perhaps pine nuts and golden raisins for a Sicilian twist, or fresh dill and mint for Greek authenticity. Make this spinach stuffed pie truly your own.
Whether served as a show-stopping centerpiece, packed for picnics, or enjoyed as a quick weekday lunch, your homemade spinach pie represents Mediterranean hospitality at its finest. It’s a versatile dish that adapts to numerous occasions while promising the same satisfying combination of flaky crunch and savory filling with every bite.
Now that you’ve mastered this step-by-step guide, you possess all the knowledge needed to create perfect spinach stuffed pie whenever the craving strikes. Your kitchen will soon fill with the unmistakable aroma of buttery phyllo and herb-scented filling a sure sign that something wonderful is about to emerge from your oven.
igj8ju